
"Dance browser. Dance!" – an Intro to Puppeteer
- Posted on: June 22, 2022
- This post was picked up and re-published by Lemundo

Hello, fellow devs! Lately I’ve been exploring ways to automate browser behaviour. In my case, I was using a tool called LHCI to test and develop the performance of an e-shop for a client, and I eventually ran into a little problem: the shop is supposed to be mobile first! And yet LHCI only loads up desktop views by default. Now what?
I remember going through the docs and trying to figure out if I had missed some obscure setting on how to load a website as a mobile-sized viewport. There are settings there, but when I actually tested them, I found them to not be accurate (at least at the time of writing). But this is not a problem. Because no matter LHCI’s shortcomings, they can almost always be overcome by one single feature: integration with Puppeteer.
What is Puppeteer?
Well, you can see the definition on the main page. But my favourite way to describe it is like Google does in the paragraph bellow:
Most things that you can do manually in the browser can be done using Puppeteer!
And they are not exaggerating!
Puppeteer is an API for scripting. Nothing more, nothing less. A set of pre-defined tools, packed as a Node library, to allow you to make the browser your puppet (pun intended!).
So what can’t it do? Well… basically anything outside of Chrome. So far, you only get to play with it by using Chrome. A Firefox version is in development (marked as "experimental" in the documentation). But, at the time of writing, Chrome is the only stable version.
If you have a wider range of environment needs (like mobile, non-chromium browsers, etc), maybe go with something like Selenium. Being older and more mature, it has a much broader compatibility range.
That being said, the main reason that Puppeteer is popular is because it’s just so easy to use!
And I’ll prove it to you, by showing it.
What are we building?
I’m gonna walk you through an early version of a script that I built for my npm package wps. I’m not gonna go though the whole thing and all its current features, but rather extract two of them and build them as a stand-alone file to show you Puppeteer’s potential. The script is a simple one, whose goal is to accomplish two things:
- Load an URL in a given viewport (approximately the sizes of a mobile, tablet and desktop devices)
- Take a screenshot of the website at that point.
I’ll divide this into steps and at the end of each I’ll add a link so you can see each change I’ve made on each file. It’ll look like this: current state: [master] initial commit – js file created · Duclearc/yt-puppeteer-demo@533cbeb
Step 1: the files and dependencies
First, we should make a folder to keep things tidy when we install dependencies. Naming doesn’t matter here. Then we move into it and then we must create a JavaScript file to house all this. I’m calling mine puppeteer.js, but you can call yours whatever you want.
Next: to use Puppeteer, we're going to download it, and to do that we need npm. So navigate to your Repo and run npm i puppeteer. This will install Puppeteer on your project.
All steps above are summarised here:
mkdir puppeteerDemo && cd puppeteerDemo && touch puppeteer.js && npm i puppeteerYou might also add the npm start script to your package.json. You can either do that manually or run this from your Repo’s terminal:
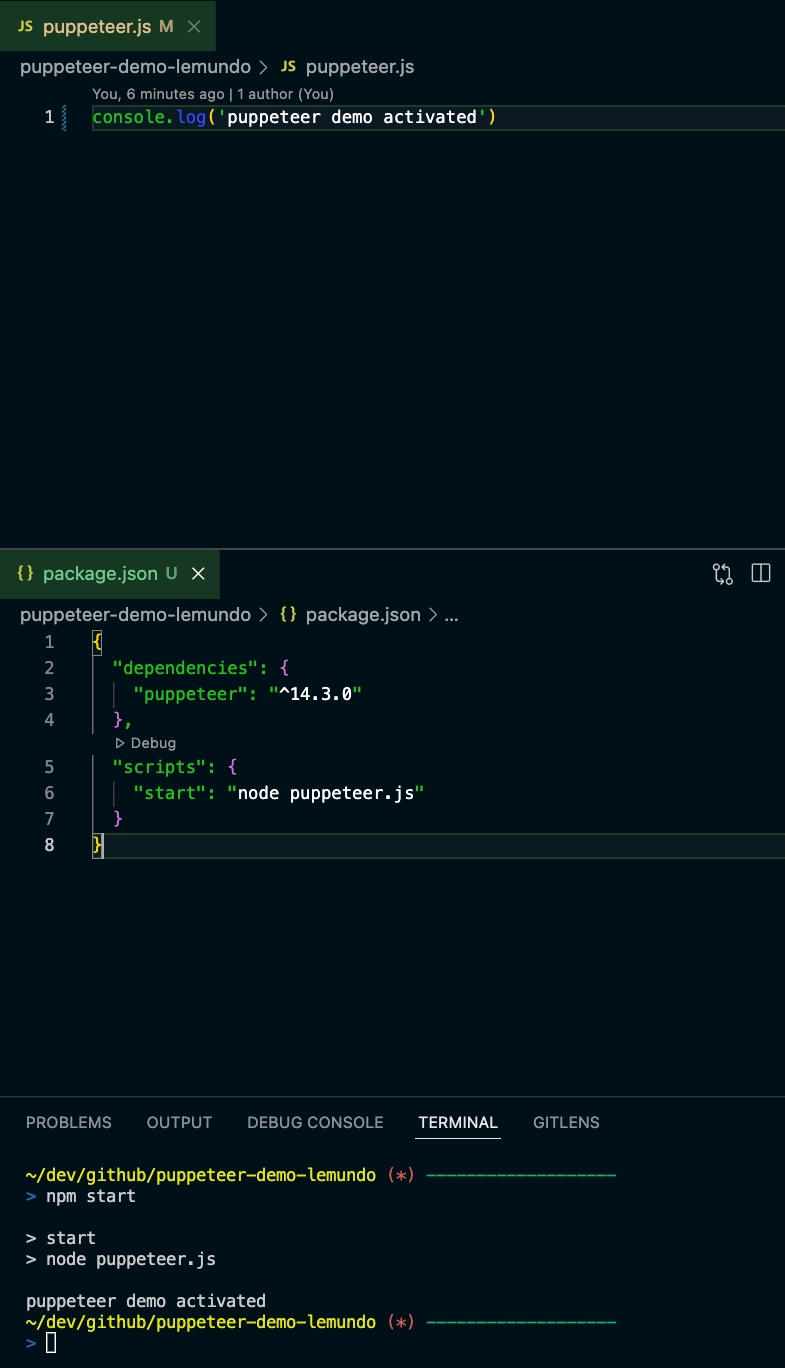
echo $(cat package.json | jq --argjson json '{"start":"node puppeteer.js"}' '. +{"scripts": $json}') > package.jsonEither way, the result should be:
// package.json
{
  "dependencies": {
    "puppeteer": "^14.3.0"
  },
  "scripts": {
    "start": "node puppeteer.js"
  }
}
To test that this entire setup is working, add a console.log to your puppeteer.js file and run npm start to see if it worked.
current state: [master] step 1 complete · Duclearc/yt-puppeteer-demo@ff97734
Step 2: manipulating the browser
Next, we have to figure out how we are going to get Puppeteer to run. It only works on the browser, so we must launch one. Thankfully, Puppeteer takes care of that for us.
Let’s start by importing Puppeteer. Personally, I don’t feel like writing that all the time, so I’ll just name it ppt. Then we can create an anonymous async function that runs as soon as the file is called. It can be populated with a simple test:
- Launch browser
- Wait 3 seconds
- Close browser
(async () => {
    // oppening browser
    const browser = await ppt.launch({
        headless: false
    });
    setTimeout(async () => {
        // closing browser
        await browser.close()
    }, 3000);
})()
Activate that with npm start and you should see your browser opening and closing… by itself.
This is all thanks to the headless: false attribute. Take it out and run the code again. See what happens.
Nothing, right?
Wrong.
Your browser is still being opened and closed, just like before. But with headless set to true. That’s its default value. And it means that the browser opens without a graphical user interface (GUI). So you don’t see anything. For some tasks that might be ok, but we want to see the magic happening, so we’re gonna keep headless as false.
But since all of this is working, we can proceed with goal 1: load an URL in a given viewport (approximately the sizes of a mobile, tablet and desktop devices).
For that we should collect the viewport (read: "screen-sizes") of a mobile, a tablet and a desktop. Since there’s about a million ones we could use, I’m going with a modern iPhone, iPad and MacBook. I’ll assemble them as an array, so it’s easier to use later. The format must be the Viewport type from Puppeteer (so an object with width and height). I got those from this website.
const viewports = [
    { width: 390, height: 844 },  // iPhone 12
    { width: 820, height: 1180 }, // iPad Air
    { width: 1536, height: 960 }  // MacBook Pro 16"
];
Having that in place, we have to pass it on to the browser we’ve just launched. There’s a few ways of doing this like setting a defaultViewport or navigating to each page in parallel… but what I’m gonna do is navigate to a page first, then set the viewport and navigate to the website we’d like. It makes the code a bit tidier in my opinion.
But wait… what’s that page thing? I thought we had the browser open already?
You were right. And I recommend you play around with this for a few minutes to get it clear in your head. But to sum it up: think of a browser as the program itself. And a page is a tab that you can use to access a url. When you open a browser it does not already have a page open. So you have to open one anyway.
Let’s start with that.
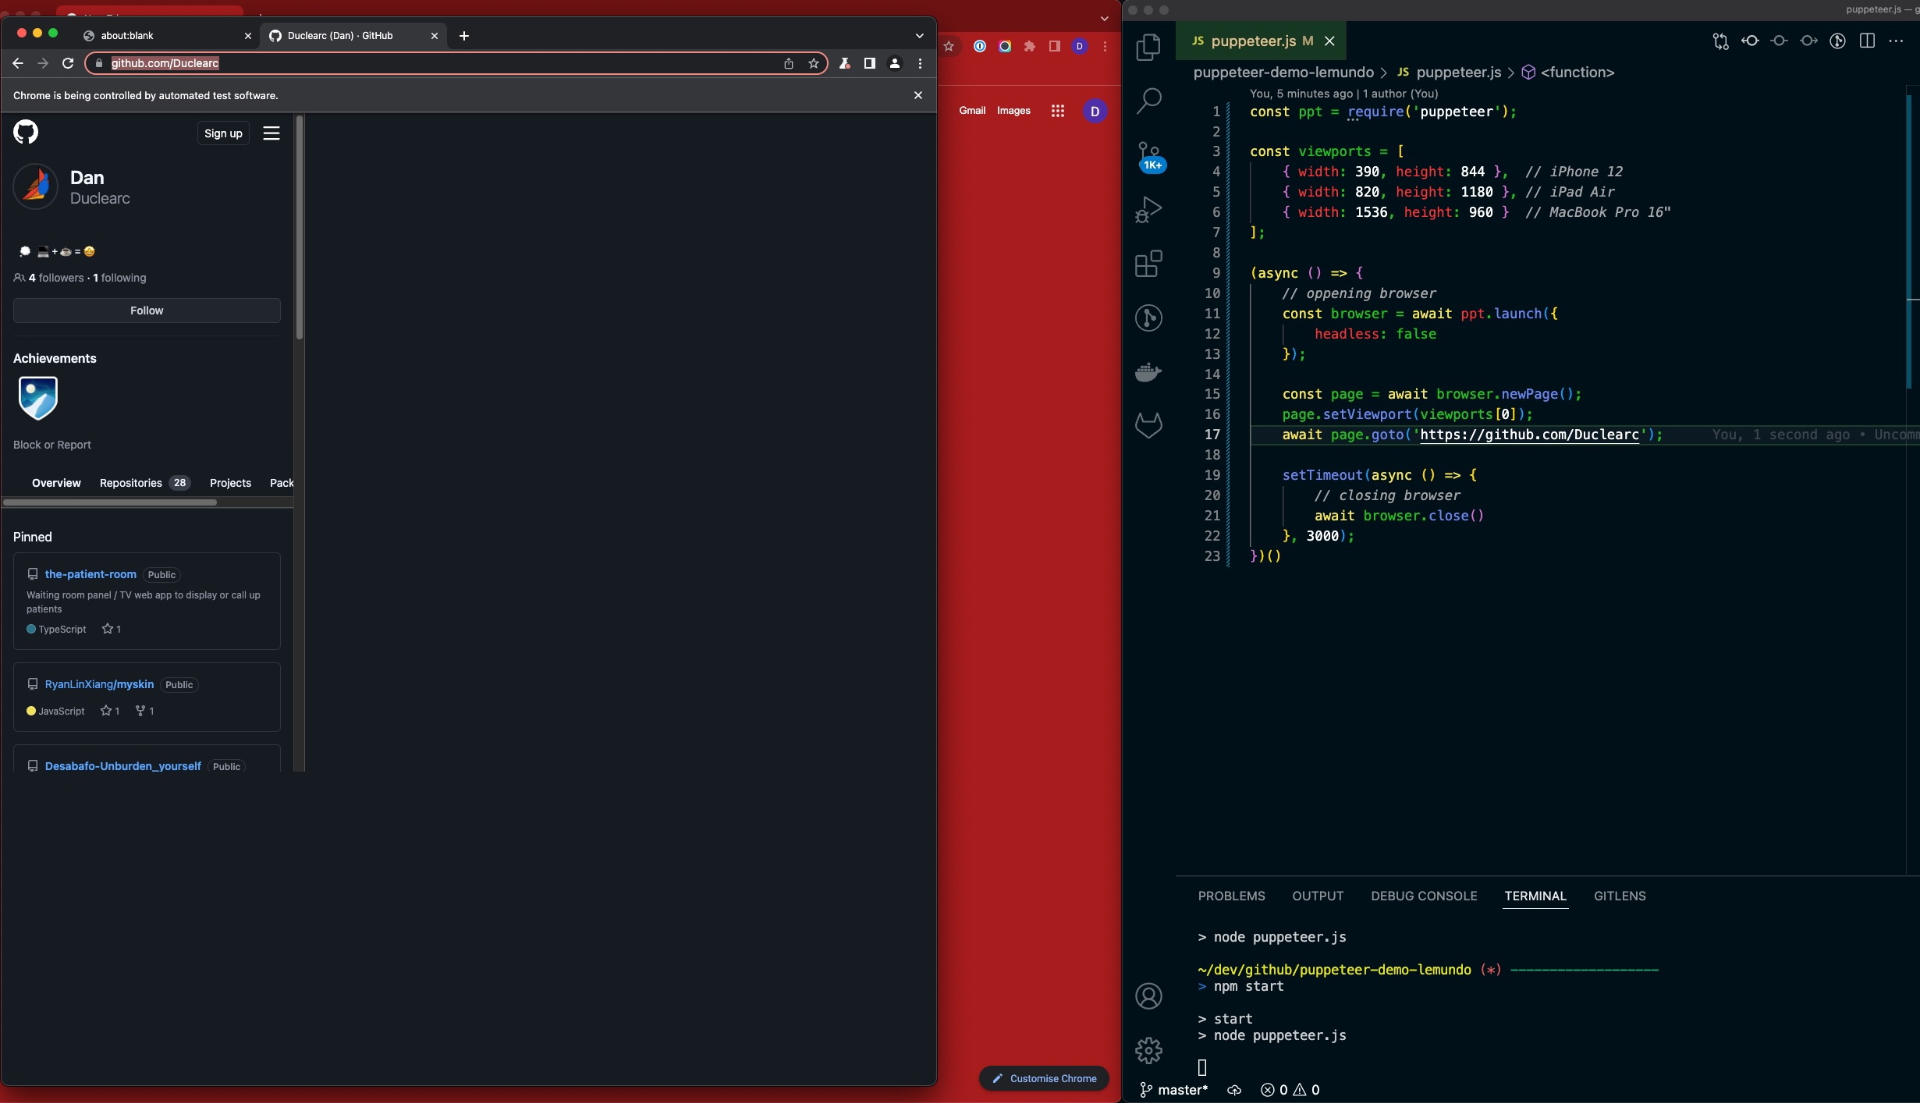
As usual, Puppeteer makes this very easy: create a constant to store your page and initiate it with browser.newPage(). To make sure everything works well, it is recommended that you use await on most Puppeteer operations. Next, we set the viewport we want with page.setViewport(viewports[0]) and last we just have to go to a url page.goto(‚https://github.com/Duclearc‘). Now run your script!
You should see a webpage on a viewport about the size of an iPhone’s.
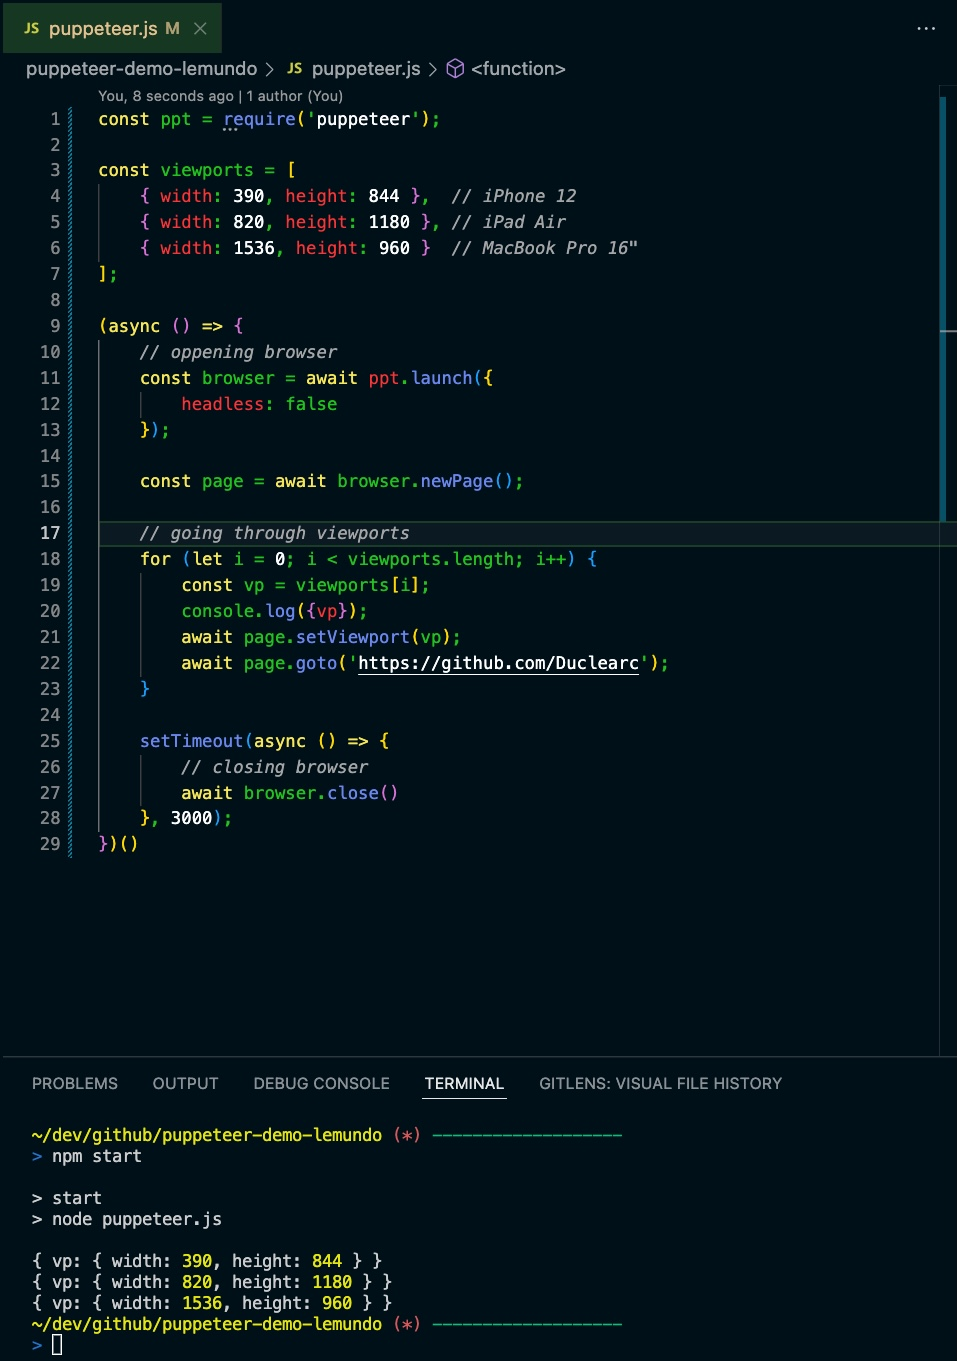
Brilliant. Trouble is, we want to load several viewports, not just one. So let’s tweak this a bit. We’ll nest this into a loop and let it run again. This should be happening faster than we can see, so it’s wise to add a console.log() here somewhere so we can get some feedback on what’s happening.
As before, the browser should open, flick it a bit as it goes through the viewports and reloads the page, plus this is what you should see in your console.
If you got this, perfect. Now we going to get the screenshots working.
current state: [master] step 2 complete · Duclearc/yt-puppeteer-demo@20cf082
Step 3: taking the screenshot
Alright. So if you were thinking that taking screenshots was gonna be easy, you’re absolutely right. Puppeteer takes care of that for us too. All we going to do is specify "where" we want it to be saved, a unique "name" of the file and the "format" of the image. You pass these into a single string to the page’s screenshot() method as a path. First things first though: creating a place to put them. I’ll keep it simple and create a screenshots/ folder at the root of the project. You can either do this manually or via the terminal with the command bellow:
mkdir screenshotsHaving that covered, we simply add one line to our loop:
await page.screenshot({ path: `./screenshots/${i}.jpg`});That's it. To break that down: Puppeteer will take a screenshot (.screenshot()) and save it on our folder (./screenshots/).
That is literally it. Now when you run npm start, you should end up with 3 files on your folder, one for each of our viewports.
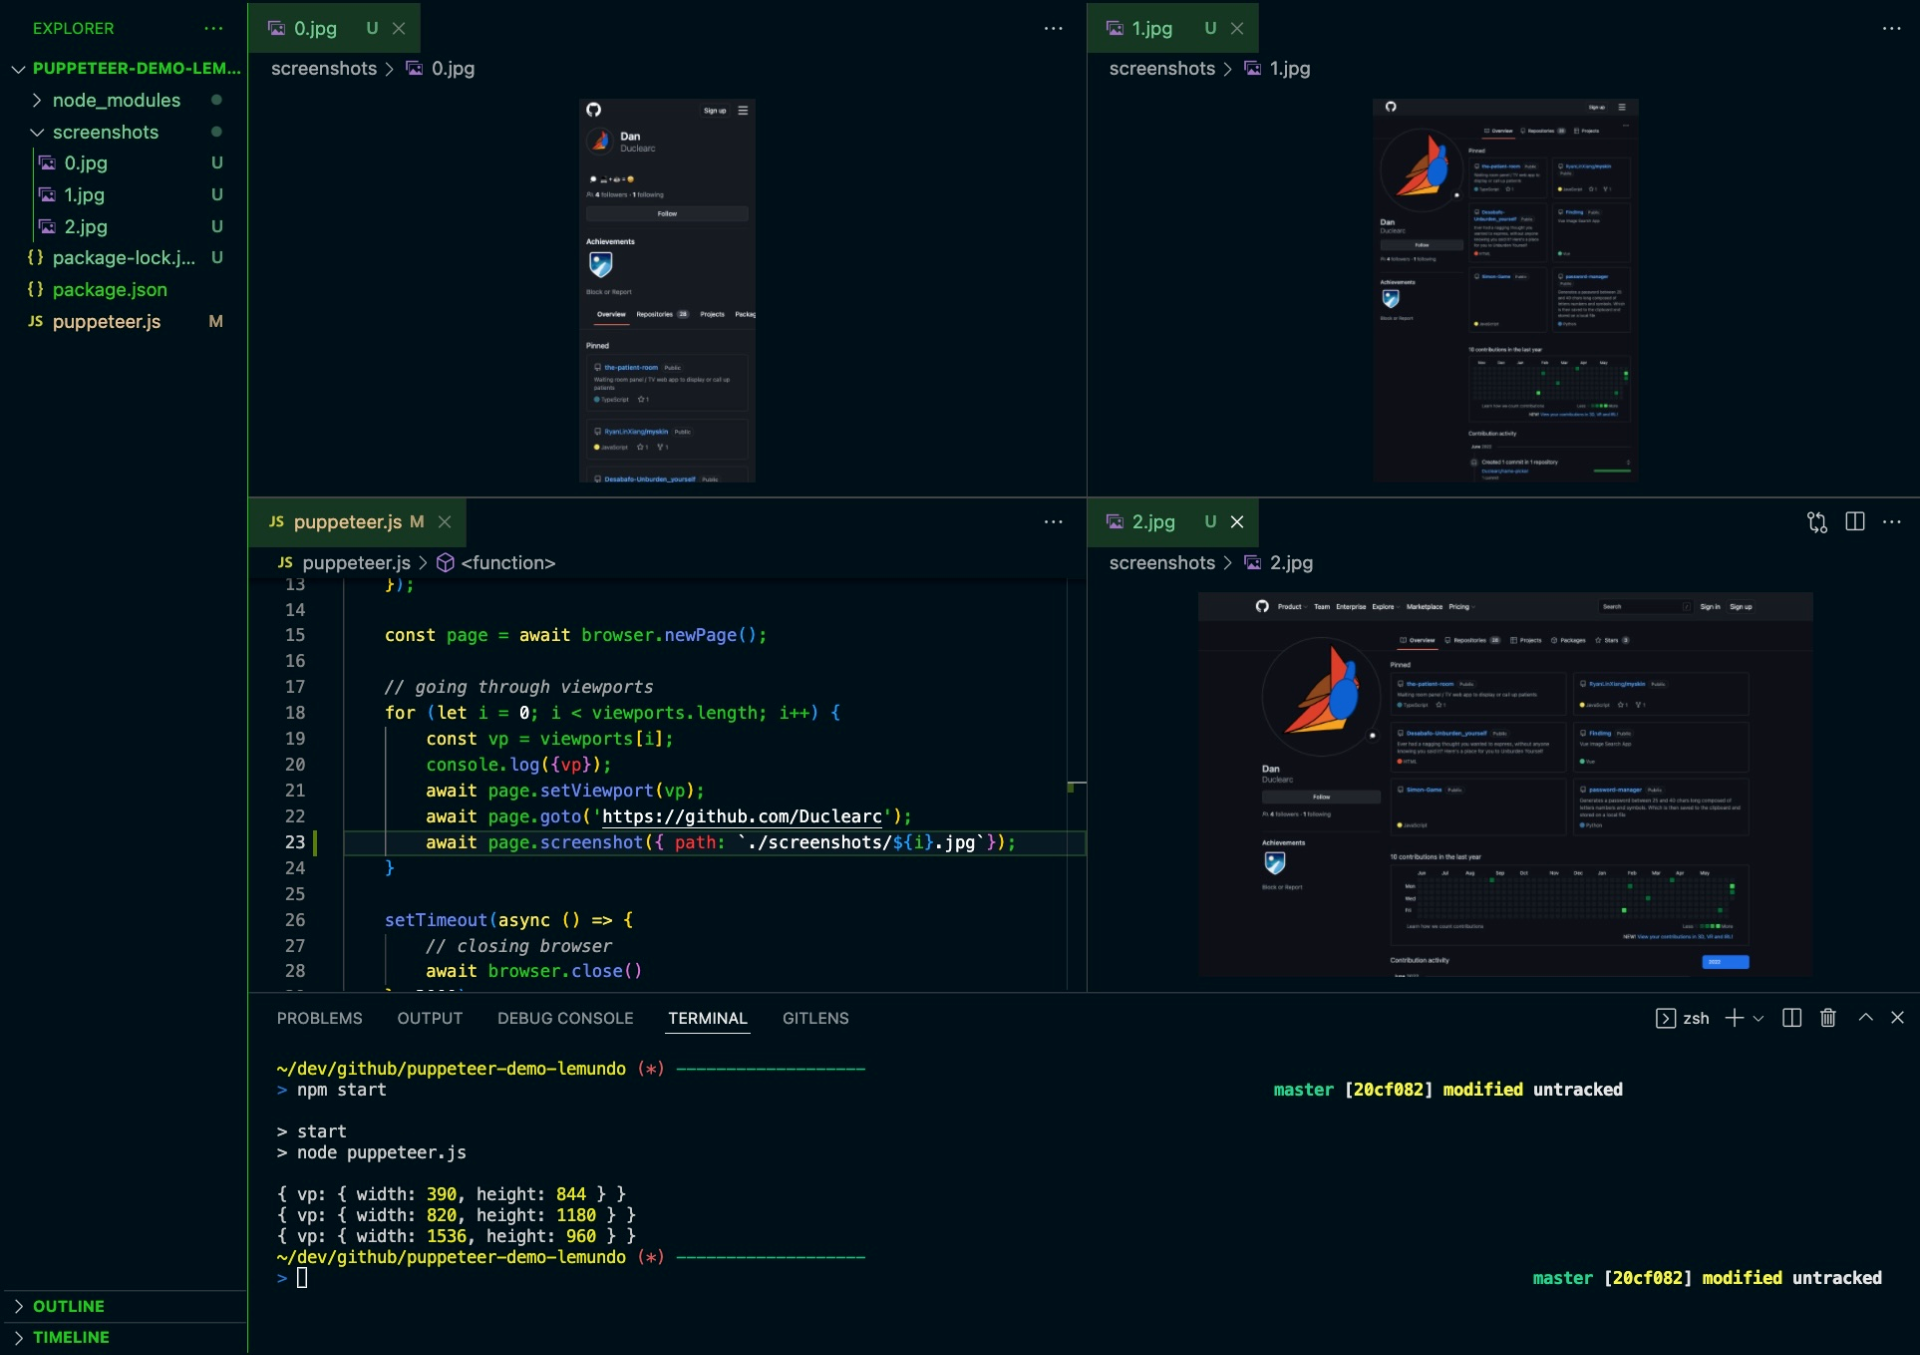
This basically it. All the functionality we wanted is done. Personally, I’d like to do some cleanup and a bit of refactoring to make this nicer. Feel free to expand on this yourself, if you like. But if you’re curious, stick with me a little longer.
current state: [master] step 3 complete · Duclearc/yt-puppeteer-demo@f1384ad
Step 4: cleanup
I’ll make this last step quick and just show you what’s bugging me without going into too much detail. Again, if you want you can go to GitHub and check this whole thing out yourself if you want to get more out of it.
removing setTimeout und console.log()
- It was just for demo purposes. But it actually serves no functionality. So it has to go!
- Remember to still close the browser after the loop though!
(async () => {
    // ...

    // closing browser
    await browser.close();

})()- You could also remove the
console.log()from the loop. If you don’t need visual feedback, off with it.
creating a better naming structure for the files
- I don’t like non-descriptive names, so having my images called by numbers bugs me.
- I’ll expand the viewports to contain a
deviceattribute where I’ll add a name I want.
const viewports = [
    { device: 'mobile', width: 390, height: 844 },  // iPhone 12
    { device: 'tablet', width: 820, height: 1180 }, // iPad Air
    { device: 'desktop', width: 1536, height: 960 }  // MacBook Pro 16"
];- Next, I’ll pass that on to my screenshot method instead of "
i".
await page.screenshot({ path: `./screenshots/${vp.device}.jpg`});- This will generate 3 files:
desktop.jpg,mobile.jpgandtablet.jpg. Much better. - But what if I do this several times a day? Then this naming scheme won’t work. Puppeteer will simply overwrite the files with the latest images of the same name. So I’m gonna create yet another function to add the date in, just to keep it orderly.
- I’ll pass it on to the
pathof the screenshot, to put it ahead of the device type.
/** Returns the current date formatted as `YYYY.MM.DD-HH:mm:ss` */
function getCurrentFormattedDate() {
    const today = new Date();
    const date = today.toISOString().split('T')[0].replace(/-/g,'.'); // YYYY.MM.DD
    const time = today.toLocaleTimeString(); // HH:mm:ss
    return `${date}-${time}`;
}

(async () => {
    // ...

    // going through viewports
    // ...
        await page.screenshot({ path: `./screenshots/${getCurrentFormattedDate()}_${vp.device}.jpg`});
    // ...
})()- Optionally you can also use Regex to get the url and add it to the file name. I won’t get into it here, but I’ll add it to the code on GitHub if you’re curious.
refactor hard-coded data
- I like tidy code. And I believe config should be separate from logic, if possible. With that in mind, I’ll extract a few things into a config file:
- the image file type
- the
pathwhere to save the screenshots - the target url
- the viewports I’ll add all those to a
config.jsonfile that I’ll then import to the main script. That way any changes I want to make can be done safely separate from the logic.
current state: [master] step 4 complete · Duclearc/yt-puppeteer-demo@efd1605
And now?
That was it! You can find the whole code on Github and video instructions on YouTube.
There’s loads more that could be done with this script. A few ideas are:
- Use Puppeteer for webpage crawling. See if you can only trigger the screenshot in case a change on the page is detected.
- Don’t change just the viewport, but also the other browser attributes to fully simulate a mobile phone (headers, touchscreen actions, etc). Hint: use Puppeteer’s built-in
devicesandemulate()method, it’ll save you a lot of work! - Access pages behind
BasicAuthand get screenshots of those.
Why I’m not doing them here now? Well, I didn’t want to rob you of all the fun of discovering the wonders of Puppeteer for yourself. Also I’m hungry. I don’t want to sit here and write anymore. 🤪
Still, contact me you want a tutorial on any of those. If there’s enough of you out there, I might revisit this.
For more tech content visit my first article on LHCI or maybe something else on this website. I love to exchange ideas and talk all things internet.